This page assumes you are using the KDE desktop.
If you are not using this release see my page on
desktops.
Desktop icons save time.
Using a desktop icon means we don't have to use the start menu to launch frequently used application code.
An icon should be used for those "tasks" you do every day.
The two things I do every day are: mount my Zip drive and connect to my ISP.
Building the Zip Drive icon
First you must make a mount point for the Zip drive so to the root login type:
mkdir /mnt/zip

I want my Zip Drive to be an automount type of device.
In order to do that make some changes to /etc/fstab.
That file holds information on the types of file systems (File System TABle) hence the name.

Use the desktop file manager to open this file (/etc/fstab) and add the following:
# Device	Mount point	FStype	Mount options                           Dump	Check
/dev/sda4	/mnt/zip	auto	sync,user,noauto,nosuid,nodev,unhide	0       0

Close and save this file.
Now to build the desktop icon.
On a blank area of the desktop right click your mouse.
Pick New | Device from the menu presented.
Enter a name for your device and press the OK button.
A new icon will appear on your desktop.

Right click the new icon and select Properties.
The General tab allows you to change the name.
The Permissions tab allows you to specify who can use this device.
The Device tab allows you to provide information about the device.

Select the Device tab:
Specify the device name of: /dev/sda4
Specify the Mount Point of: /mnt/zip
Leave the File Type set to default
Then pick your Mount and Unmount icons from the list presented.
Press the OK button.

Now when you click this icon your Zip drive will be automatically mounted and opened for you.
To unmount it right the icon and select unmount.
Building the ISP icon
What follows assumes that you have built a task to connect to your ISP.
If you have not see my page on modems.

On a blank area of the desktop right click your mouse.
Pick New | Program from the menu presented.
Enter a name for your task and press the OK button.
A new icon will appear on your desktop.

Right click the new icon and select Properties.
The General tab allows you to change the name.
The Permissions tab allows you to specify who can use this device.

The Execute tab allows you to provide information about the task.
You can browse for tasks but here just enter usernet.
You can change the icon from this screen I left mine set to the cog-wheel.

The Application tab allows you to associate this icon with an application.
I used the comment area to document the icon.

Press the OK button and your changes are saved to the desktop icon.
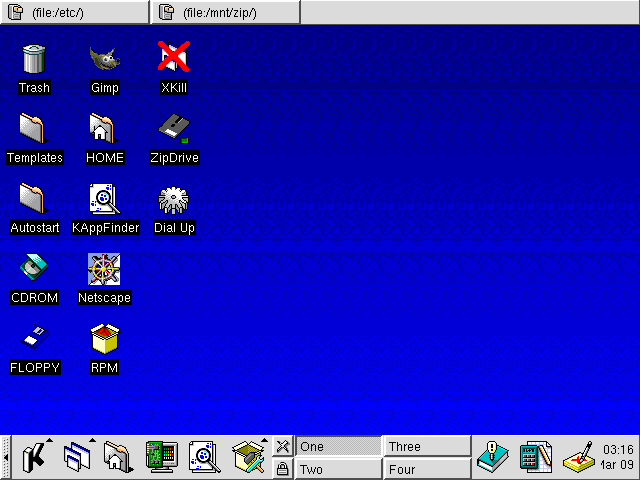
With these icons added my desktop looks like this:
